What are the 3D lighting techniques in design?
Update: 29/10/2025
3D lighting utilizes tools and methods to simulate the behavior of natural and artificial light in computer-generated scenes, thereby shaping the appearance of surfaces, materials and architectural spaces. By adjusting placement, brightness and color, it sets the mood, depth and visual accuracy in both interior and exterior designs. This article defines 3D lighting, explains key 3D lighting techniques and demonstrates how designers apply them to real-world projects, providing readers with practical knowledge to create more realistic and expressive visualizations.
1. What is 3D lighting technique?
3D lighting technique is the collection of tools and techniques used to simulate light in computer-generated 3D environments. Lighting setups help make a scene visible by introducing various light sources, just as in photography or filmmaking. These tools offer a wide range of options, from basic directional lights to advanced global illumination methods, depending on the project’s needs.
Lighting systems provide flexibility in both detail and functionality, allowing artists to choose effects, sources and methods that suit the design goals. Shadows, reflections and highlights are essential elements of lighting systems, which contribute to building the mood, defining space and setting the time of day or weather conditions. Realistic lighting is especially valuable in interior, exterior and architectural visualizations where accurate visual context supports design decisions.
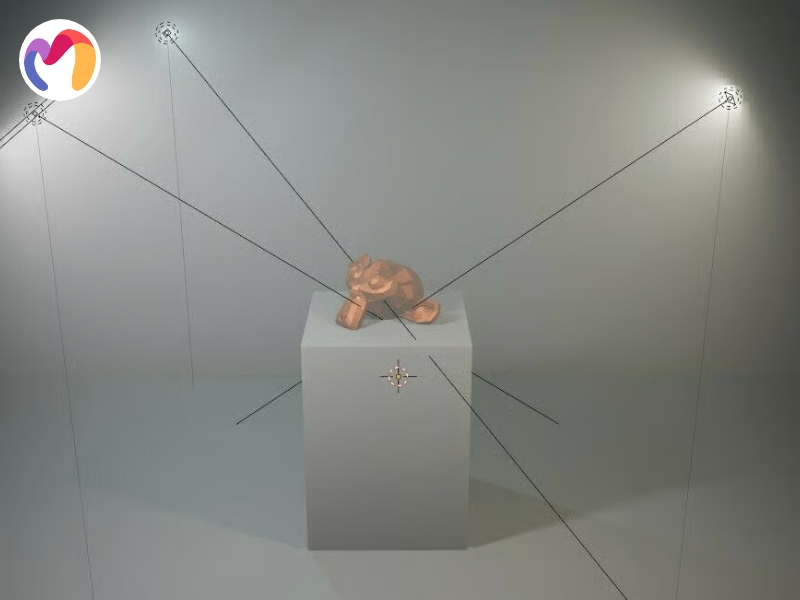
2. What are the types of 3D light sources?
A well-lit 3D scene depends on five main types of light sources, each offering different effects based on the context and visual goals of the project:
- Directional light: Parallel rays come from a distant origin and strike every object in the scene evenly. This kind of light works well for simulating sunlight, creating consistent highlights and shadows across wide surfaces. Artists often use it to define broad daylight conditions in outdoor architectural scenes.
- Area light: A rectangular light-emitting surface casts rays in a specific direction, producing soft and defined highlights. The shape and size of the source influence how light diffuses across nearby materials. Its resemblance to natural window light or studio softboxes makes it ideal for controlled indoor environments.
- Point light: A small, central source radiates light outward in all directions like a bare bulb. The intensity of the light falls off with distance, creating localized highlights and shadows. Designers often rely on this source for simulating lamps, candles, or other compact lighting elements.
- Spotlight: A cone-shaped beam narrows light to a focused area and fades toward the edges. This spotlight effect mimics a flashlight or stage light and helps direct attention within a 3D space. The angle and decay rate give artists control over dramatic lighting setups.
- A hemispherical source casts uniform ambient light across an entire scene from above. This type of lighting replicates the soft radiance of an open Sky dome light: sky and is widely used in exterior settings. It helps maintain balance in shadowed areas while preserving a sense of natural illumination.
- Ambient light: Constant, directionless light uniformly brightens all surfaces, simulating scattered environmental light, reducing harsh shadows and providing base brightness, although it alone can make objects appear flat.
- Diffuse light: Scattered light hits surfaces and reflects in all directions, depending on the angle between the source and the surface, giving objects basic color and shading while revealing shape and depth through smooth brightness variations.
- Specular light: Focused reflections of a light source appear on shiny surfaces, creating bright spots that shift with the viewer’s angle, enhancing realism by showing glossiness and simulating how reflective materials behave.
3. What are the basic 3D lighting techniques?
A clear lighting foundation in 3D visualization begins with three basic techniques that guide how artists structure scenes for clarity, contrast and depth:
- One-point lighting: A single source provides the only illumination in the scene and casts strong shadows without additional lights to soften them. This setup introduces bold contrast and stark divisions between light and dark areas. Designers often use it for dramatic scenes or to highlight a subject’s form with minimal distraction.
- Two-point lighting: A key light is paired with a secondary source that softens contrast or enhances shape definition. The main light remains dominant, while the second adjusts depth or separates objects from backgrounds. This method offers more balance while keeping the scene expressive and defined.
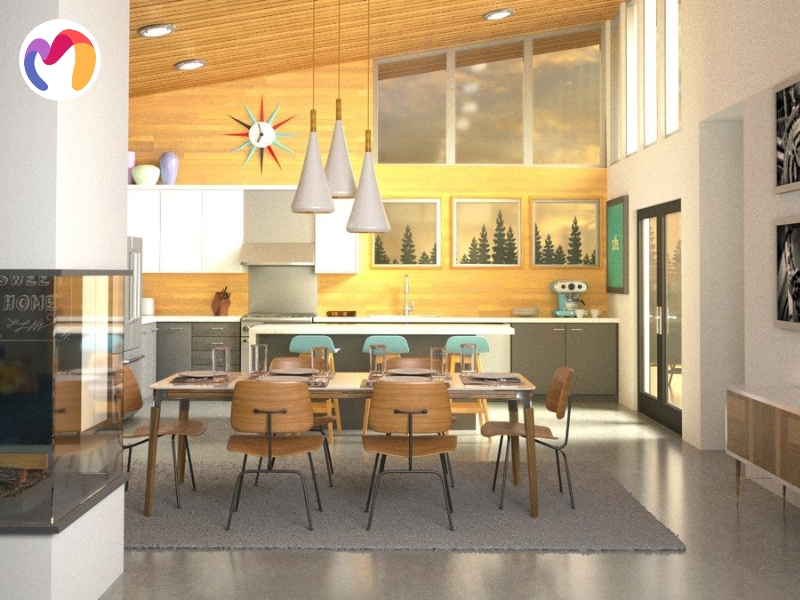
- Three-point lighting: Three lights—the key, the fill and the backlight—work together to shape a well-rounded visual field. The key light sets the direction and intensity, the fill reduces shadows and the backlight outlines the subject to improve separation. This setup is widely used for architectural renders and interior design because of its clarity and control.
4. What are the advanced 3D lighting techniques?
Modern 3D lighting pushes realism further by accurately simulating how light behaves in real-world environments. Five key techniques below play a crucial role in achieving lifelike renders:
- High Dynamic Range (HDR) Lighting: HDR lighting uses high-fidelity image data to simulate real-world lighting conditions. HDR images store a wider range of luminance values than standard images, enabling subtle reflections and more accurate light interactions. This technique supports natural results when lighting needs to match environmental cues.
- Global Illumination (GI): GI accounts for the way light bounces between surfaces, enriching scenes with indirect light. While direct lighting focuses only on the source, GI adds complexity by simulating secondary light behavior. The result brings warmth and cohesion to materials and spaces in renderings.
- Physically Based Lighting (PBL): PBL applies the laws of physics to control how light moves, reflects and refracts in a digital scene. The method considers how surfaces absorb or scatter light, producing results that follow natural behavior. Accurate reflections and refractions give architectural models a more lifelike finish.
- Lighting Animation: This approach uses motion to reflect changes in time or environment, such as a shift from afternoon to evening. Lighting can move, dim, or change color based on narrative or environmental needs. Animated lights are common in walkthroughs and cinematic sequences where dynamic scenes unfold.
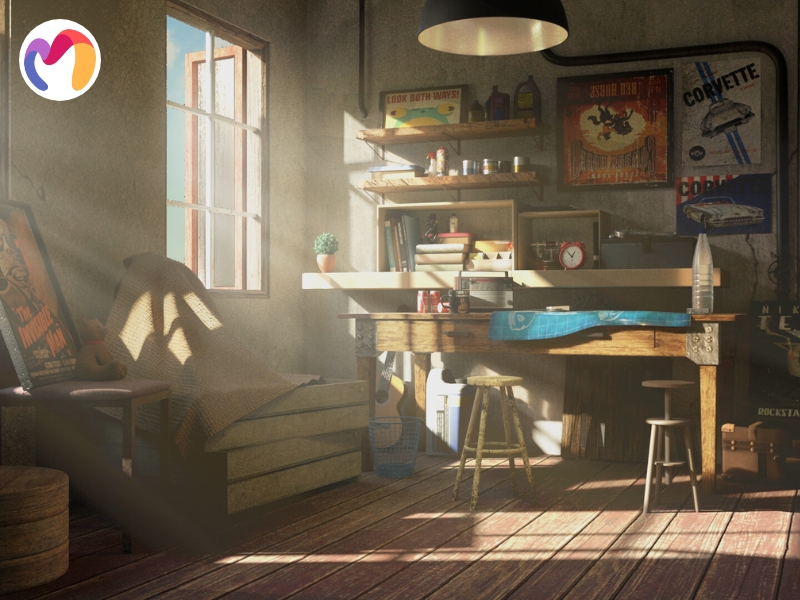
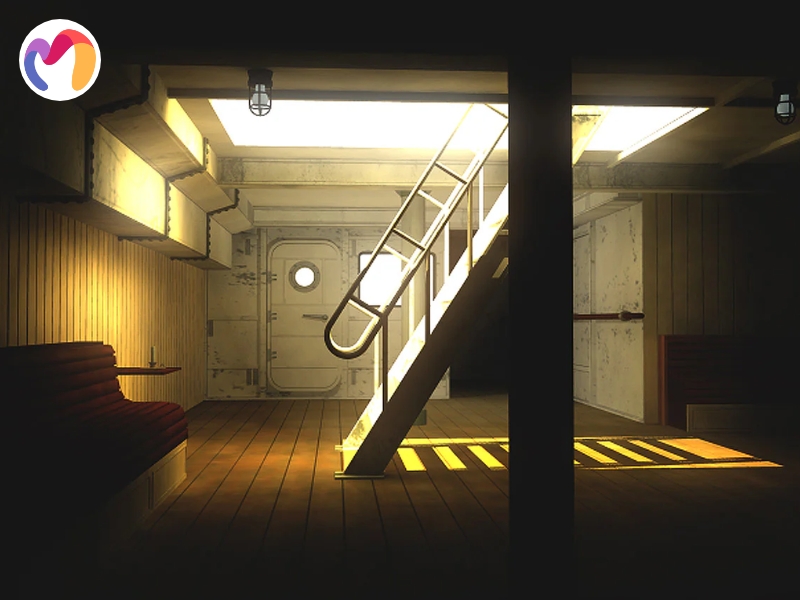
- Volumetric Lighting (“God rays”): Volumetric lighting reveals the interaction of light with atmospheric elements like fog, smoke, or dust. Visible beams, or “rays,” create a sense of space and bring emotional tone to static and moving images. These effects work especially well in dramatic interiors or moody outdoor designs.

5. Four tips for creating realistic 3D lighting
There are four practical tips for creating realistic 3D lighting that can guide artists toward better visual outcomes in architectural design:
- Observation of real-world lighting: Natural behavior of light offers valuable references and observing its shifts throughout the day reveals how shadows stretch, colors shift and brightness fades. Interior spaces change tone as the sun moves or when artificial lights turn on and understanding these patterns helps artists replicate them more believably. Studying how environments are lit in different situations builds visual memory and sharpens spatial sensitivity.
- Simplification of lighting setups: Realistic daylight scenes often rely on just one or two sources (usually the sun and sky), so overcomplicating the light arrangement can make a render look unnatural. Outdoor spaces don’t require multiple artificial lights since real-world sunlight already casts strong, directional shadows and ambient fill. Keeping setups minimal allows for clarity, consistency and faster adjustment across large architectural scenes.
- Observation of cinematic lighting: Cinematographers craft visual narratives through light and their mastery can inform digital artists in how to shape mood and focus. Watching how scenes are framed and illuminated in films teaches the use of color temperature, contrast and silhouette. Film lighting often mirrors architectural goals: revealing depth, guiding the eye and emphasizing space with precision.
- Use of off-screen lighting effects: Suggested light sources that remain outside the frame help create mystery and realism by mimicking natural environments. A window glow that doesn’t show the window, or a hallway light casting into a room, makes the space feel larger and connected. This kind of lighting anchors the viewer in a believable world, expanding the scene beyond what is directly visible.
| Turn your ideas into 3D reality — check out our free model categories! | |||
 |
 |
|
 |
| Architecture 3d model | Building 3d model | Fence 3d model | 3D Scenes |
6. Frequently Asked Questions About 3D Lighting Techniques
What is the difference between hard and soft lighting in 3D?
Hard lighting casts sharp shadows and enhances contrast, often used in product renders and dramatic scenes. It comes from small, focused light sources like spotlights or directional lights. Soft lighting, created with large area lights or HDRI environments, diffuses shadows for a natural look, making it ideal for interiors, character renders and realistic environments. Choosing between them depends on the desired mood and visual clarity.
How do I choose the right lighting technique for my 3D project?
The choice depends on subject, mood and technical constraints. Directional lighting highlights product details, while environmental lighting creates realistic outdoor and indoor scenes. Volumetric lighting enhances the atmosphere and global illumination improves realism. Start with a basic three-point setup, experiment with light intensity and placement and refine based on rendering performance and deadlines.
Can 3D lighting techniques be applied to 2D art?
Yes, 3D lighting principles improve depth and realism in 2D illustrations. Directional lighting helps define form and shadow placement, while volumetric lighting adds atmosphere through gradients and subtle light falloff. Unlike in 3D software, where lighting is physics-based, 2D artists must manually interpret how light interacts with surfaces, adjusting shading, reflections and color temperature for accuracy.
What software is best for learning 3D lighting techniques?
Blender is beginner-friendly with strong lighting tools. Maya and Cinema 4D are industry standards for animation and VFX. 3ds Max excels in architectural lighting. V-Ray and Corona Renderer provide advanced photorealistic rendering. Recommended learning resources include Blender Guru, LinkedIn Learning, Greyscalegorilla and official Autodesk and Chaos Group documentation.
7. Conclusion
3D lighting techniques are crucial for shaping the mood, realism, and clarity of architectural visualizations. This involves a range of methods, from basic key-fill-back setups to more advanced, physically based and HDR lighting, all of which help artists make smarter choices for both interior and exterior designs. 3DMaxter complements these insights with a vast library of 3D models in .max, .obj and .fbx formats, covering diverse styles and categories and backed by flexible pricing and refund policies, allowing designers to download high-quality assets and enhance project presentations efficiently.
3DMAXTER LTD
- Email: [email protected]
- Phone: +1 (929) 450-2898
- Address: 95-38 Queens Blvd, Rego Park, NY 11374, USA
3DMAXTER
![]()
![]()
![]()
![]()
![]()
Related Posts
With their diverse designs, dome pendants not only provide functional illumination but also add a touch of personality and elegance to any room. Whatever your preferred style may be, there's a dome pendant to match every taste and complement any interior decor seamlessly.