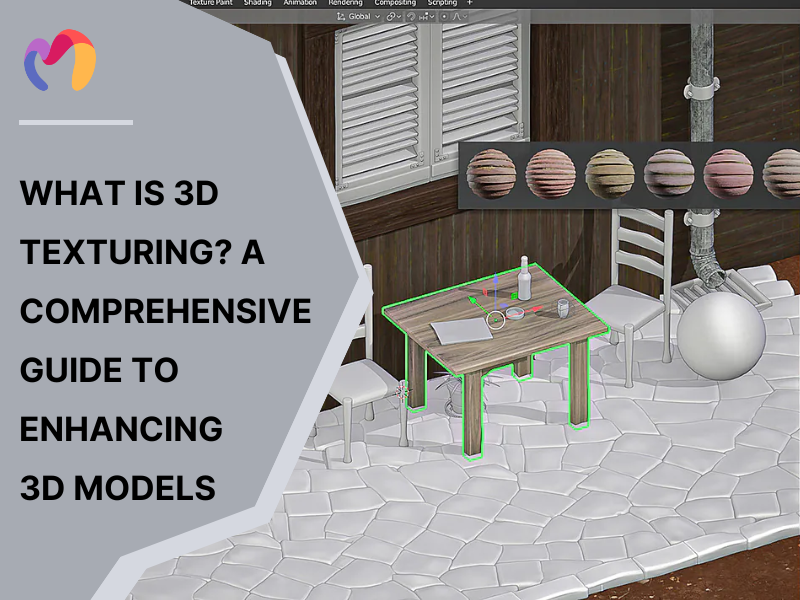
What Is 3D Texturing? A Comprehensive Guide to Enhancing 3D Models
Update: 29/10/2025
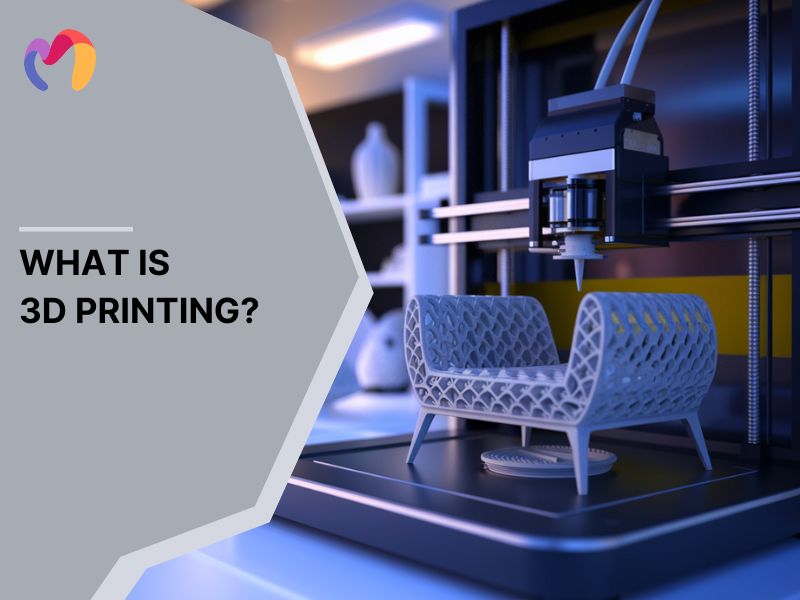
3D texturing is the process of adding realistic textures to 3D objects, using photographs or original designs and applying them to models while adjusting lighting and refining details (Source: Adobe). This technique transforms simple shapes into lifelike models, forming the foundation for architectural visualizations. Designers and architects use advanced texturing to show materials, spatial layouts and lighting effects clearly. This article explains what is 3d texturing, key texturing principles, mapping methods, procedural workflows and specific uses for interior, exterior and architectural projects, enabling creators to produce visuals that accurately represent surfaces, environments and atmospheres across residential and commercial spaces.
1. What is 3D texturing?
3D texturing is the process of adding surface details to 3D models. It involves applying colors, patterns and material properties onto a model’s surface to replicate real-world materials. Artists or designers can create textures through digital painting or by using photographic references, then map them onto the model while adjusting lighting and fine details.
By layering multiple textures, surfaces can display complex characteristics, from natural stone, grass and gravel to metal or fabric. These properties define how light reflects or passes through the surface, transforming basic geometric shapes into lifelike architectural spaces and realistic design visualizations.
Professional 3D artists recognize three fundamental qualities that define effective texturing techniques for architectural and design applications.
- Material definition: Surface textures convey material composition through visual properties alone, allowing viewers to identify whether objects are made of wood, stone, metal or fabric without additional contextual information.
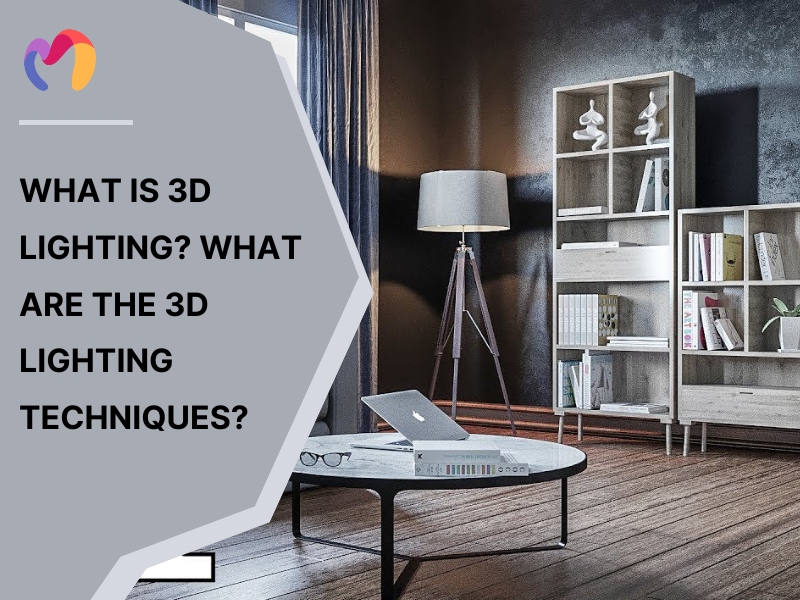
- Light interaction: Objects exhibit realistic reflection, refraction and emissive characteristics when light sources interact with textured surfaces, necessitating the accurate simulation of real-world material behavior and optical properties.
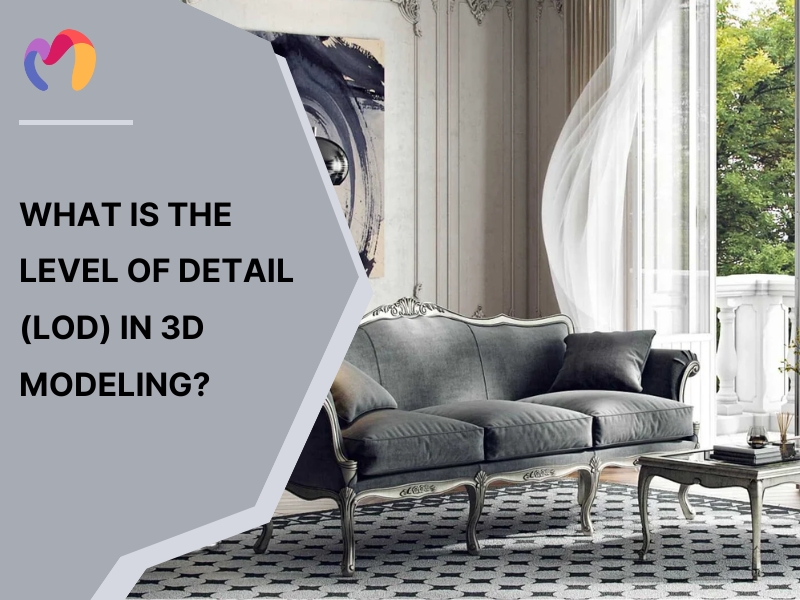
- Surface detail integration: Microscopic features, including wrinkles, scratches, cracks and surface irregularities, appear through texture mapping rather than complex geometric modeling, reducing computational load while maintaining visual fidelity.
2. What are 3D texturing techniques?
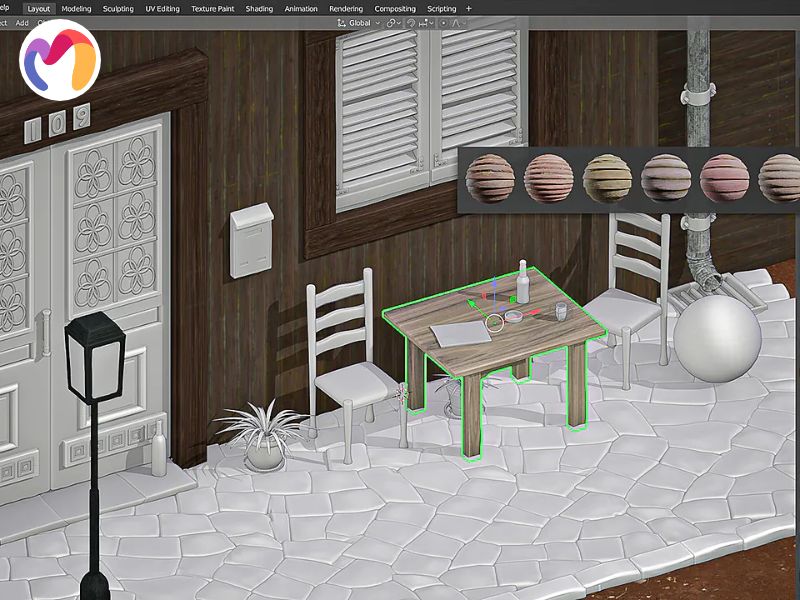
3D texturing involves various methods to create and apply surface details to 3D models, enhancing their realism and visual appeal. Below are the key techniques used in the process:
- Painting: Digital texture painting lets artists apply textures directly onto 3D models with precision. This method gives creators full control over texture placement and enables crafting unique, non-repetitive designs. It’s ideal for intricate patterns and customized artistic elements.
- Procedural Texturing: Procedural texturing uses algorithms to generate textures programmatically. It is effective for creating seamless, repeatable patterns and simulating natural surfaces like wood, stone or metal. This technique allows infinite variations without manual adjustments.
- PBR Texturing: Physically Based Rendering (PBR) focuses on realistic material creation by simulating physical properties. It ensures materials appear consistent under various lighting and environmental conditions, making it standard for modern rendering pipelines.
- Photogrammetry: Photogrammetry transforms photos of real-world objects into digital textures. This technique captures high-detail surfaces and creates photorealistic materials, providing a reliable way to replicate real-life appearances in virtual environments.
- Sculpting: Digital sculpting adds detailed surface features directly onto 3D models. It is indispensable for creating organic details, such as skin pores, fabric folds or surface irregularities, making it a preferred method in character and environment design.
- UV Mapping: UV mapping unrolls 3D surfaces into a flat 2D space, enabling accurate texture alignment. This technique ensures textures fit correctly on models, avoiding distortion and misalignment. It is essential for high-quality 3D texturing workflows.
- Decal Application: This technique uses flat, two-dimensional images and places them onto 3D models to add specific details, such as logos, signs or surface features. Decals allow designers to enhance interior branding and small surface elements without complex UV mapping, making it easier to show localized textures accurately.
- Hybrid Techniques: This method combines several approaches, including digital painting, procedural generation and image-based texturing, to create rich and varied material appearances. Hybrid techniques enable designers to depict multiple surface characteristics in a single model, producing detailed and realistic visualizations for interior, exterior and full architectural projects.

| Unlock your creativity — browse our free 3D model library and start designing. | |||
 |
 |
 |
 |
| Mirror 3d model | Clothes 3d model | Pillows 3d model | Vase 3d model |
4. What are the types of texture mapping?
Material representation accuracy depends on 12 specialized texture mapping techniques that control surface properties and visual characteristics across architectural visualization workflows.
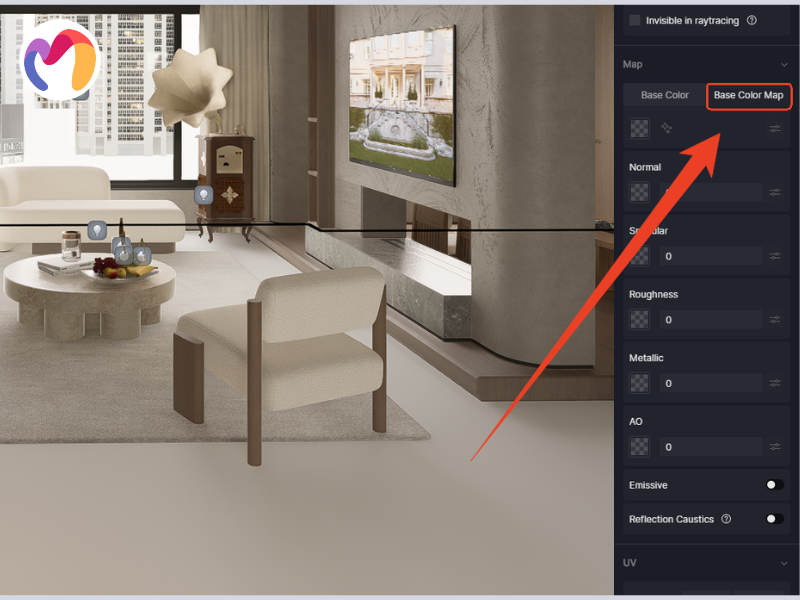
- Color Mapping: This technique applies base colors and patterns to surfaces, defining the main visual characteristics and helping identify materials in architectural models. It creates the foundation for realistic textures and shading.
- Diffuse Mapping: This mapping method controls how surfaces scatter light in all directions, simulating non-reflective materials and generating natural shading variations across architectural surfaces.
- Normal Mapping: This RGB-based technique simulates surface details by changing normal vectors without altering geometry, offering high-resolution surface depth cost-effectively for visualizations.
- Bump Mapping: This grayscale mapping method creates the illusion of surface height using light calculations, where black shows depressions and white indicates elevations without modifying geometry.
- Displacement Mapping: This height-based method modifies the actual mesh geometry to produce real three-dimensional surface changes and accurate silhouette shifts in architectural models.
- Specular Mapping: This reflection control technique defines where highlights appear and their intensity, determining surface glossiness and material shine.
- Reflection Mapping: This environmental mapping method applies surrounding imagery to reflective surfaces, creating realistic mirror-like effects on glass, metal and polished materials.
- Ambient Occlusion Mapping: This shadow enhancement method adds soft shadows in corners and crevices, improving depth perception and realism in architectural presentations.
- Glow Mapping: This self-illumination technique marks areas that emit light, simulating LEDs, signage and lighting fixtures in interior designs.
- Opacity Mapping: This transparency control method uses grayscale or alpha channels to determine surface visibility, from fully transparent to fully opaque.
- Roughness Mapping: This surface mapping method controls light scattering and glossiness, defining the appearance from matte to polished finishes.
- Metallic Mapping: This material classification technique distinguishes metallic from non-metallic surfaces, affecting reflectivity and color response in architectural visualizations.
5. What is the process of 3D texturing?
Creating high-quality 3D textures involves a structured workflow essential for achieving realistic visual results.
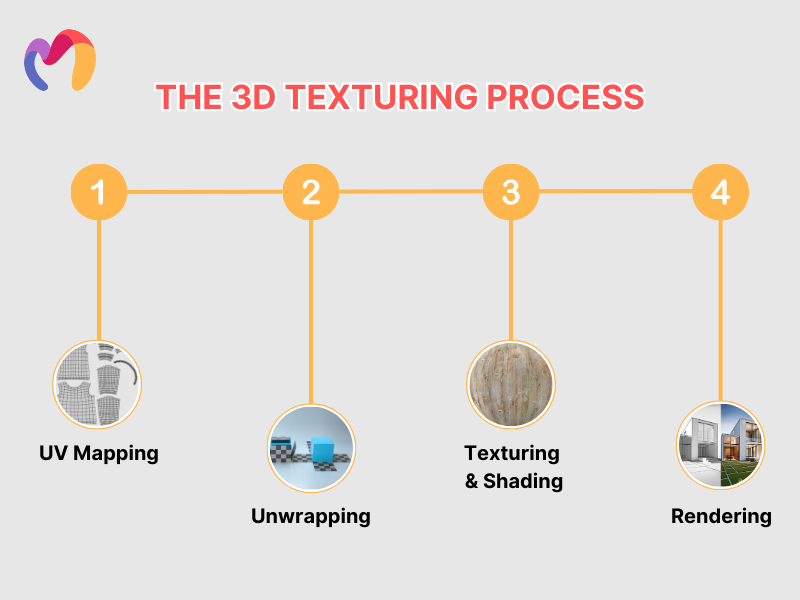
- UV Mapping: The process begins with UV mapping, where 3D models are flattened into 2D coordinate systems. This step sets the stage for precise texture placement and minimizes distortions in the mapping process.
- Unwrapping: Artists define seams and adjust UV island layouts during unwrapping. This approach optimizes texture space usage, reduces waste and ensures seamless integration of textures across model surfaces.
- Texturing and Shading process: This phase applies texture maps and establishes material properties. Techniques like procedural generation or hand-painting create base colors, surface patterns and material finishes. Artists assign shaders to enhance realism by simulating properties like gloss, roughness or transparency.
- Rendering: In the final step, rendering calculates how light interacts with textures. This reveals the model’s appearance under different lighting setups, providing a polished visual output ready for integration into scenes or projects.
6. Tips to create realistic 3D texturing
Successful implementation of the four-step texturing workflow benefits from 9 practical tips that refine material accuracy and enhance visual authenticity across architectural visualization projects:
- Reference material analysis: Real-world material studies and photographic references provide accurate details on surface textures, color variations and light interaction, helping replicate authentic architectural materials.
- High-resolution image selection: Quality texture images deliver clear details for close-up views, while avoiding pixelated or blurry visuals that reduce realism in architectural presentations.
- Precision UV mapping: Accurate UV unwrapping aligns textures correctly on complex surfaces, preventing visible seams or distortions across architectural models and interior elements.
- Multi-layer texture integration: Combining albedo, normal, roughness, metallic, ambient occlusion, specular and gloss maps builds material depth and realistic surface interactions.
- Procedural and custom techniques: Hand-painted details and algorithm-based textures create complex patterns, surface imperfections and specialized architectural features beyond standard photographic textures.
- Scale and orientation calibration: Proper texture sizing and directional alignment produce believable repetition patterns and maintain surface consistency across models.
- Lighting environment testing: Testing textures under multiple lighting conditions confirms consistent appearance, ensuring materials look natural in diverse rendering scenarios.
- Performance-based resolution optimization: Assigning high-resolution textures to focal elements and optimized resolutions to background components balances visual quality with computational efficiency.
- Systematic workflow documentation: Maintaining structured methods, documenting techniques and iteratively refining processes with professional feedback supports continuous improvement and consistent visualization quality.
7. Frequently Asked Questions about 3D Texturing
How do 3D textures work?
Three-dimensional texturing processes apply two-dimensional image data to geometric surfaces while defining light interaction properties for realistic material representation. Surface mapping techniques coordinate texture placement with model geometry and shader calculations determine how illumination affects material appearance across architectural visualization projects.
What is 3D textured mesh?
Textured mesh structures comprise triangular polygon networks that form a three-dimensional surface geometry with applied material information. Vertex positioning algorithms minimize spatial distances between point cloud data and surface representations, creating accurate geometric foundations for architectural modeling and interior design visualization applications.
What is the size of a 3D texture?
Maximum texture resolution reaches 2048x2048x2048 pixels for volumetric applications, though memory requirements increase exponentially with higher resolutions. File size considerations influence performance optimization decisions and storage requirements for architectural visualization projects requiring detailed material representation across multiple surface elements.
8. Conclusion
This article explains what is 3d texturing and covers the principles of material definition, mapping methods, procedural workflows and professional strategies for architectural visualization. 3DMAXTER offers high-quality, textured 3D models in industry-standard formats, including native .max files with .obj and .fbx export options, enabling seamless integration across multiple software and rendering engines. Downloading these assets improves workflow and delivers visually compelling architectural results.
3DMAXTER LTD
- Email: [email protected]
- Phone: +1 (929) 450-2898
- Address: 95-38 Queens Blvd, Rego Park, NY 11374, USA
3DMAXTER
![]()
![]()
![]()
![]()
![]()
Related Posts
With their diverse designs, dome pendants not only provide functional illumination but also add a touch of personality and elegance to any room. Whatever your preferred style may be, there's a dome pendant to match every taste and complement any interior decor seamlessly.